The service is available not only in-browser but also through desktop applications for Windows and macOS, as well as on mobile.
While professional video editors debate whether Adobe Premiere or DaVinci is better, for regular folks, it's easier to fire up an online editor and cut footage without hassle. However, there are way more online solutions out there than just four, and clicking through each to find the best fit isn't ideal.
So, I did some poking around for you.
Often in articles about online video editors, readers recommend CapCut as a cooler alternative. And from the first glance, there's merit to that. The service is available not only in-browser but also through desktop applications for Windows and macOS, as well as on mobile.
The desktop version works smoothly, while the web version requires some effort. Additionally, projects and their data are not synchronized between them. Also, the editor's interface visually differs significantly, although functionality-wise, it's more or less the same.
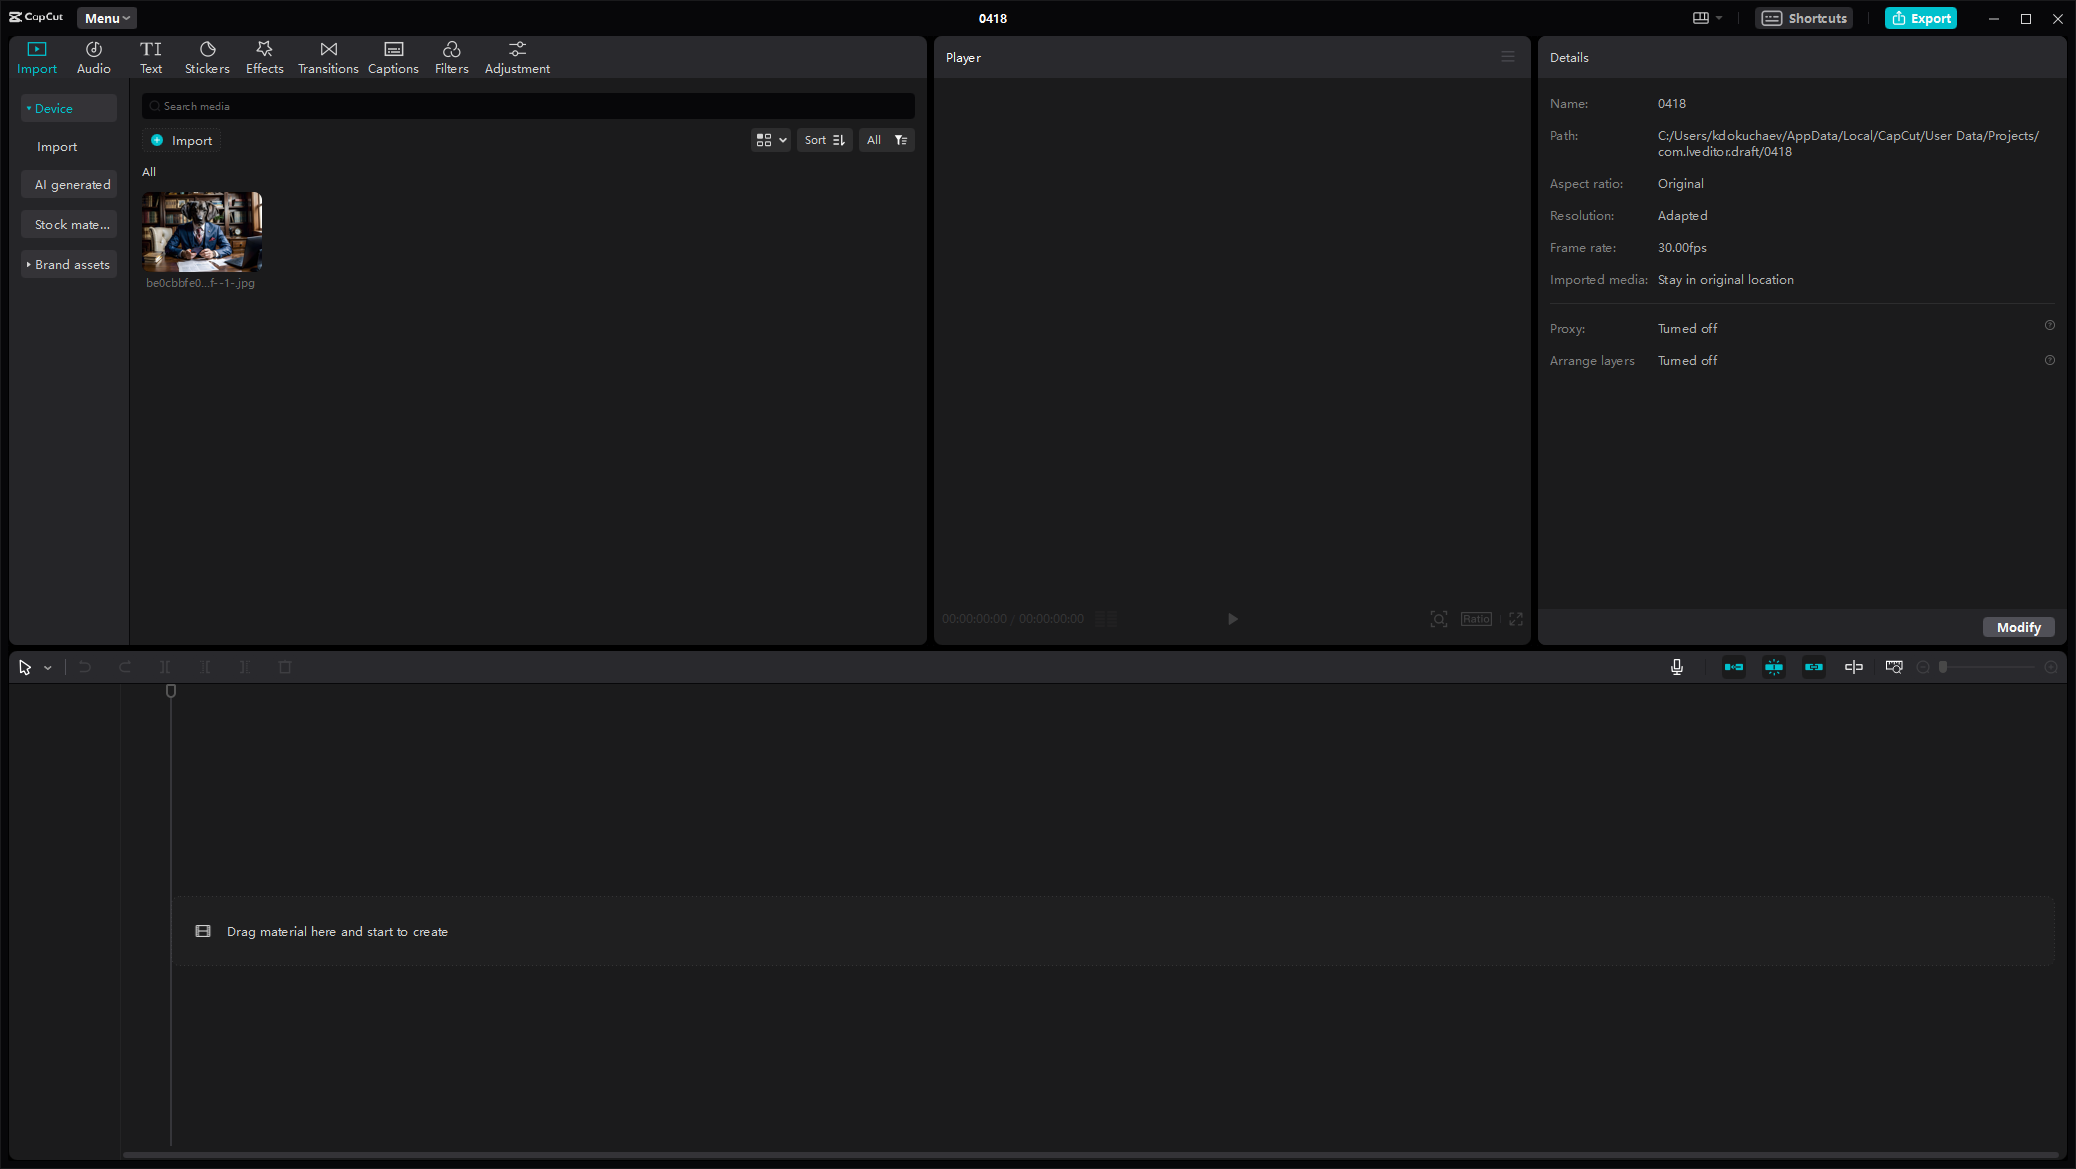
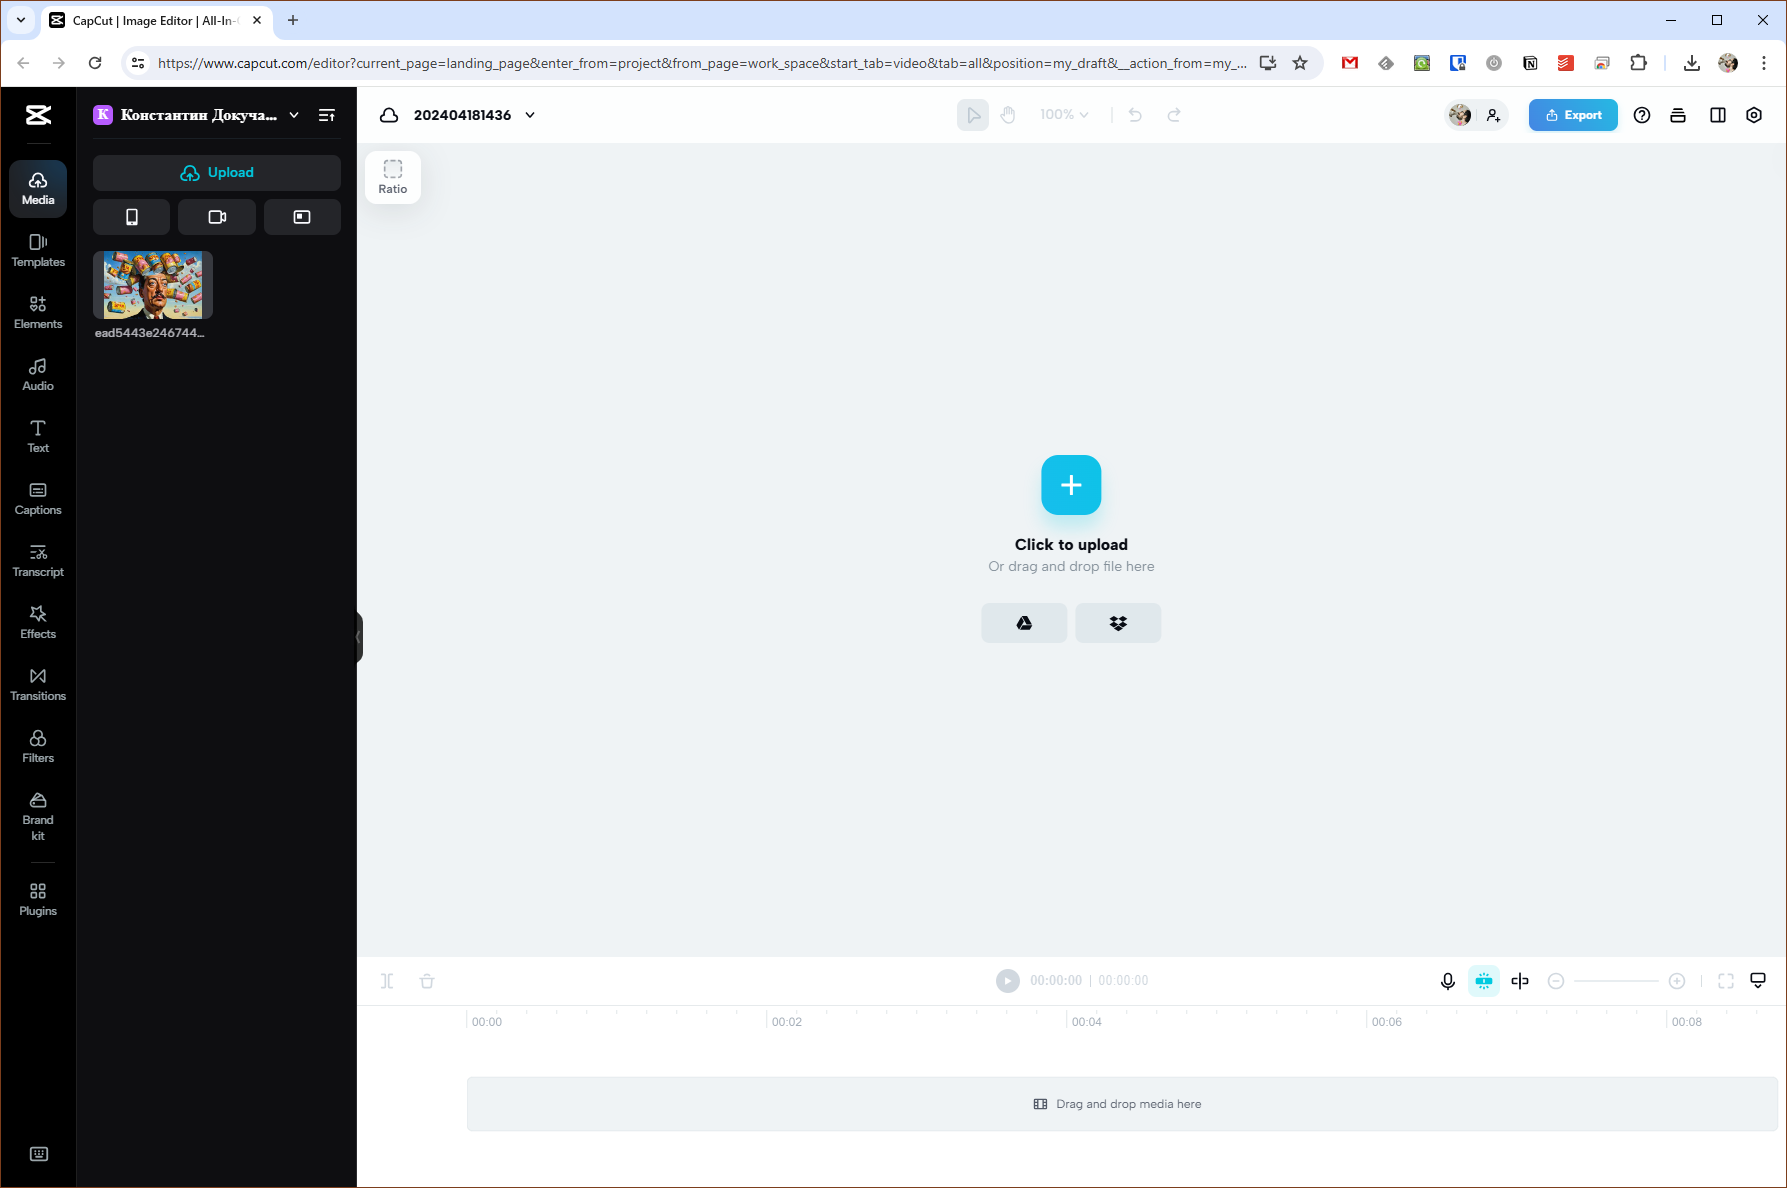
On the left is the interface of the Windows version, and on the right is the browser version.
The main difference is that the web version offers a set of various templates, making it easier to create videos with minimal effort on your part.

The desktop version is suitable for those who know exactly what they want. Here, the editor is comparable to similar applications with the ability to finely adjust the workspace layout and provide detailed project information, preset customization, and other details.
So, the decision on which version of CapCut to use is up to you. Below, however, I'll still talk about the web version, as it's more accessible for the average user. But keep in mind that everything (and even a bit more) can be done in a normal desktop application.
What You Can Do in the Editor
CapCut's editor largely repeats the capabilities of other online editors I've talked about many times. Based on templates or from scratch, you can edit video projects at an advanced level by adding various effects, transitions, and other embellishments.
The editor has a multi-track timeline for working with various types of media. I couldn't find any limitations on the number of tracks.

Depending on the track type, various actions will be available via the context menu. You can trim, split, crop, and rotate content. Speed adjustment from the timeline isn't possible, but it can be done directly from the layer editor.
Video, photo, and audio files in popular formats are available for upload. Additionally, you can record screencasts with webcam and microphone support.
Layer Features
For photos and videos, you can add a mask. However, the selection here is mediocre, with only six options available.

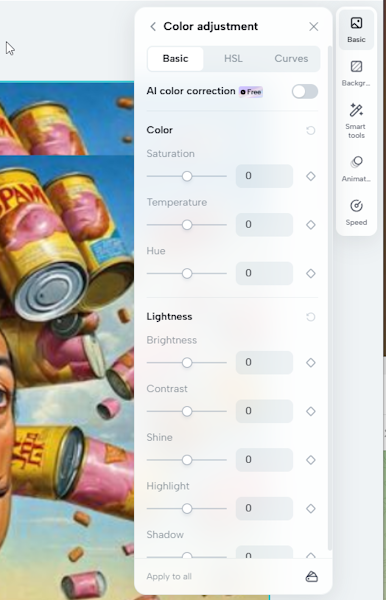
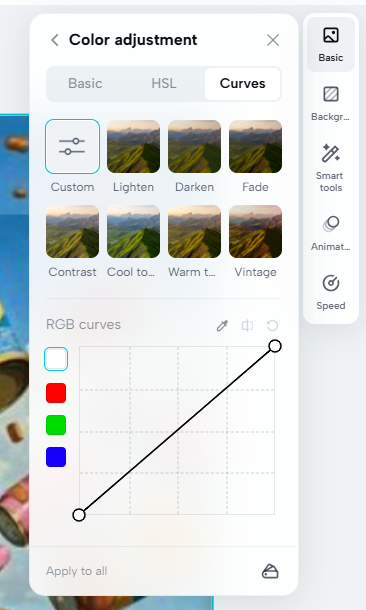
However, the color correction tool is excellent. It offers three correction options: basic, HSL, and Curves. Interestingly, AI correction is available in the basic version. Here, you can adjust color, brightness, and other parameters. HSL and curves adjustments are self-explanatory.
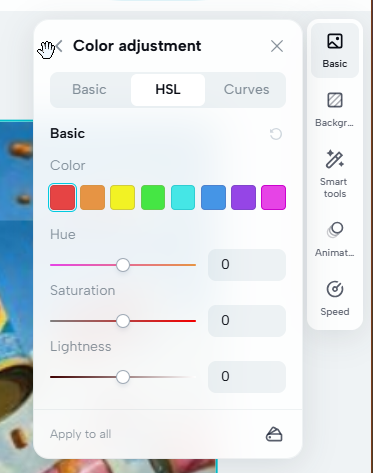
For videos, stabilization can be activated. You can specify any fill color for the background layer. For audio, you can specify fade-in and fade-out times, remove noise, and activate beat detection.
Each layer can be set to various blending modes: make the layer transparent, overlay dark or light colors, and so on.
The Smart Tools feature provides quick basic processing using neural networks. For photos and videos, you can remove the background and perform quick face retouching. For videos, you can also activate automatic framing based on objects in the scene.

Animation and Speed tools for photos and videos allow you to control layer animation and speed, respectively. The latter is also available for audio.
For audio tracks, instead of Smart Tools, voice modulation is available. You can select one of the effects and apply it to your recording.

Additional Tools
In the Elements section, you can add various stock elements to your project: videos, photos, AI characters, stickers, and more.

By the way, characters have their own animation and framing settings. You can add text, select a voice, and thus create your virtual announcer.
Other sections work similarly to Elements. You can add background music, text effects, simple effects, transitions, and filters.
Another interesting tool is Captions. With it, you can add subtitles by uploading a file, manually, or automatically based on your voice recording or song lyrics.
Transcript (or transcription of the audio track) works with multiple languages. After adding the transcription track to the project, you can directly edit the recognized text and change the scene order in the video.
Regarding Prices
You can immediately upload the finished project to one of the popular social networks or download it offline. Moreover, in high quality and without watermarks. I wasn't asked for money during project editing either.

The CapCut website also doesn't mention prices, and they position themselves as a free solution for video creation. However, the iOS version, for example, has various subscriptions starting from $7.99. When and for what you will actually have to pay remains a mystery to me.
Conclusions
If you need a full-fledged video editor available on any device and for free, then CapCut is definitely worth a try. This service allows you to easily edit videos at a fairly professional level with various effects.
