

Do you have Instagram and have a website? Amazing! In this post, I'll show you how to quickly embed one into the other.
Do you have Instagram and have a website? Amazing! In this post, I'll show you how to quickly embed one into the other.
LightWidget will help you embed your Instagram feed into your website. There are several widgets to choose from, custom CSS, support for multiple accounts and filters by tags, using the Instagram API.
Service connection
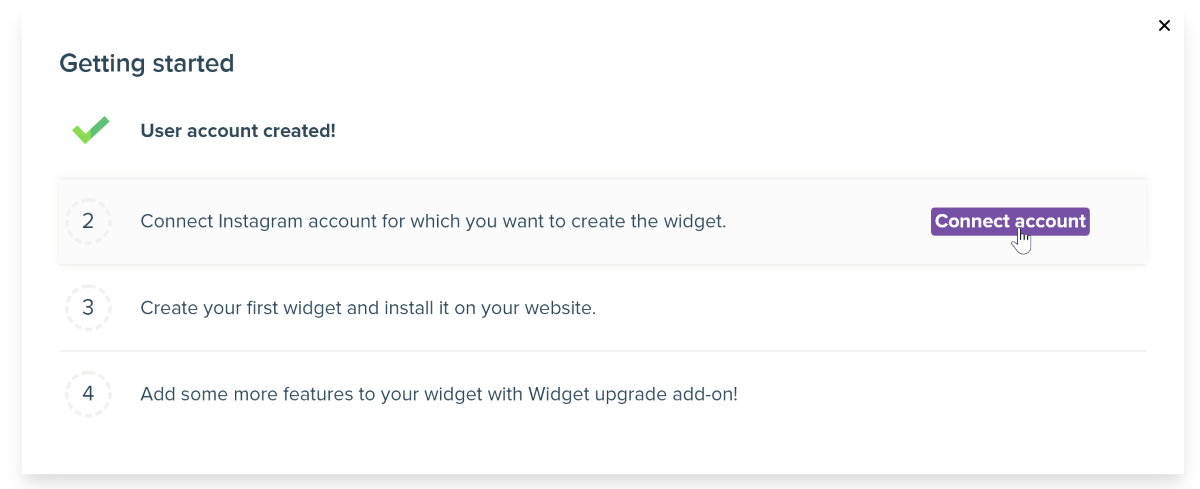
To start working with LightWidget in the service, of course, you will need to register and connect your Instagram account. Both regular accounts and business are supported.
As I wrote in the beginning, the service uses the official API of the social network. This means that the connection is made officially and your account will not be hijacked or banned for using LightWidget.
Customizing widgets
After connecting Instagram, all that remains is to click on the Create Widget button and start creating the widget.

The widget editor is visual and you don't need to understand HTML and CSS. In the right pane, you see your Instagram feed with the ability to preview from both desktop and tablet or mobile device.
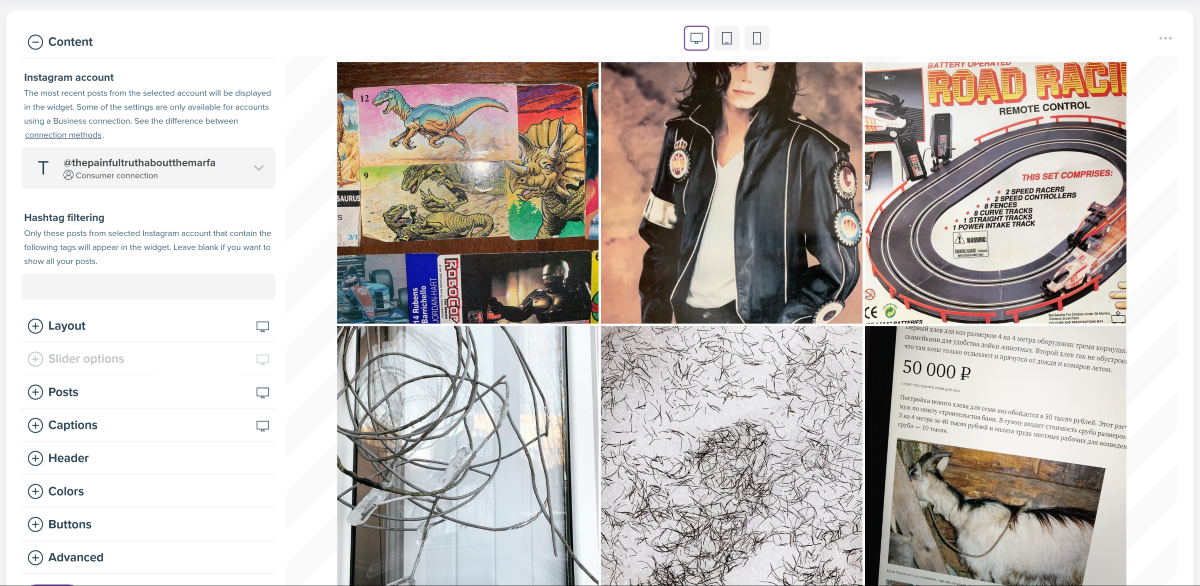
On the left panel, you can switch your account, add filtering by hashtags and customize the appearance of the widget.
For this, LightWidget has several options:
- Layout allows you to choose the location of the photo: grid, slider or masonry-layout. You can also choose the number of columns, the number of photos and adjust the indents.
- When choosing a slider layout, in the Slider Options parameter you can configure additional features: speed and visibility of arrows for switching images.
- In the Posts section, you can further fine-tune the appearance of the feed: display images in a square or original format, show all photos from the carousel or only the first, action when clicking on a photo, hover effects.
- The Caption section is responsible for displaying captions for photos: whether to display them or not, caption length and font size.
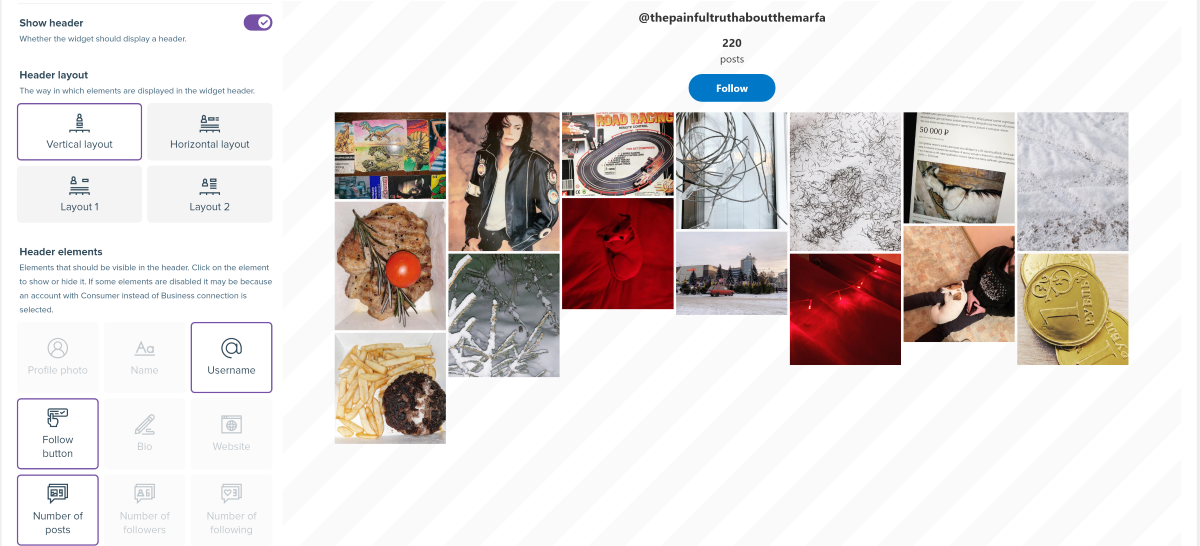
- Header will help you add a header to the widget with a call to follow you: there are several types of location and button options.
- The Colors section is responsible for the color design of each parameter, from text to highlighting.
- The rest of the sections are responsible for very narrow settings for displaying the widget. For example, loading indicator, block width for mobile phones, etc. You can also add your own CSS code to fit the widget style to your site.
When everything is ready, you need to click the Create button and get the widget code to add to the site. For example, like this:
Price
LightWidget is free to use with no explicit restrictions. However, it should be borne in mind that in this case the posts will be updated once a day and there is no support for an HTTPS connection.
You can activate both with a one-time payment of ten dollars.